In this post we expand our Vivado Non-Project Mode build script to include programming the generated bitstream onto the FPGA in batch mode.
In our previous post we discussed in detail how to script the bitstream generation for our FPGA Audio PRocessor in Vivado’s Non-Project Mode. That’s where the script stopped, and we said we needed to start the Hardware Manager from the Vivado GUI to program our bitstream onto the FPGA.
Shortly after publishing that article, I realized this doesn’t have to be the case. The programming of the FPGA can also be scripted, that way we don’t need to open the Vivado GUI at all (at least not for the basic, most common workflow).
So how do we go about it? The easiest way, which I chose to follow, is to program the FPGA once using the GUI and then copy the commands transcribed in the Tcl console to our build script. The Vivado Tcl console prints all commands in blue, as shown in the figure below.
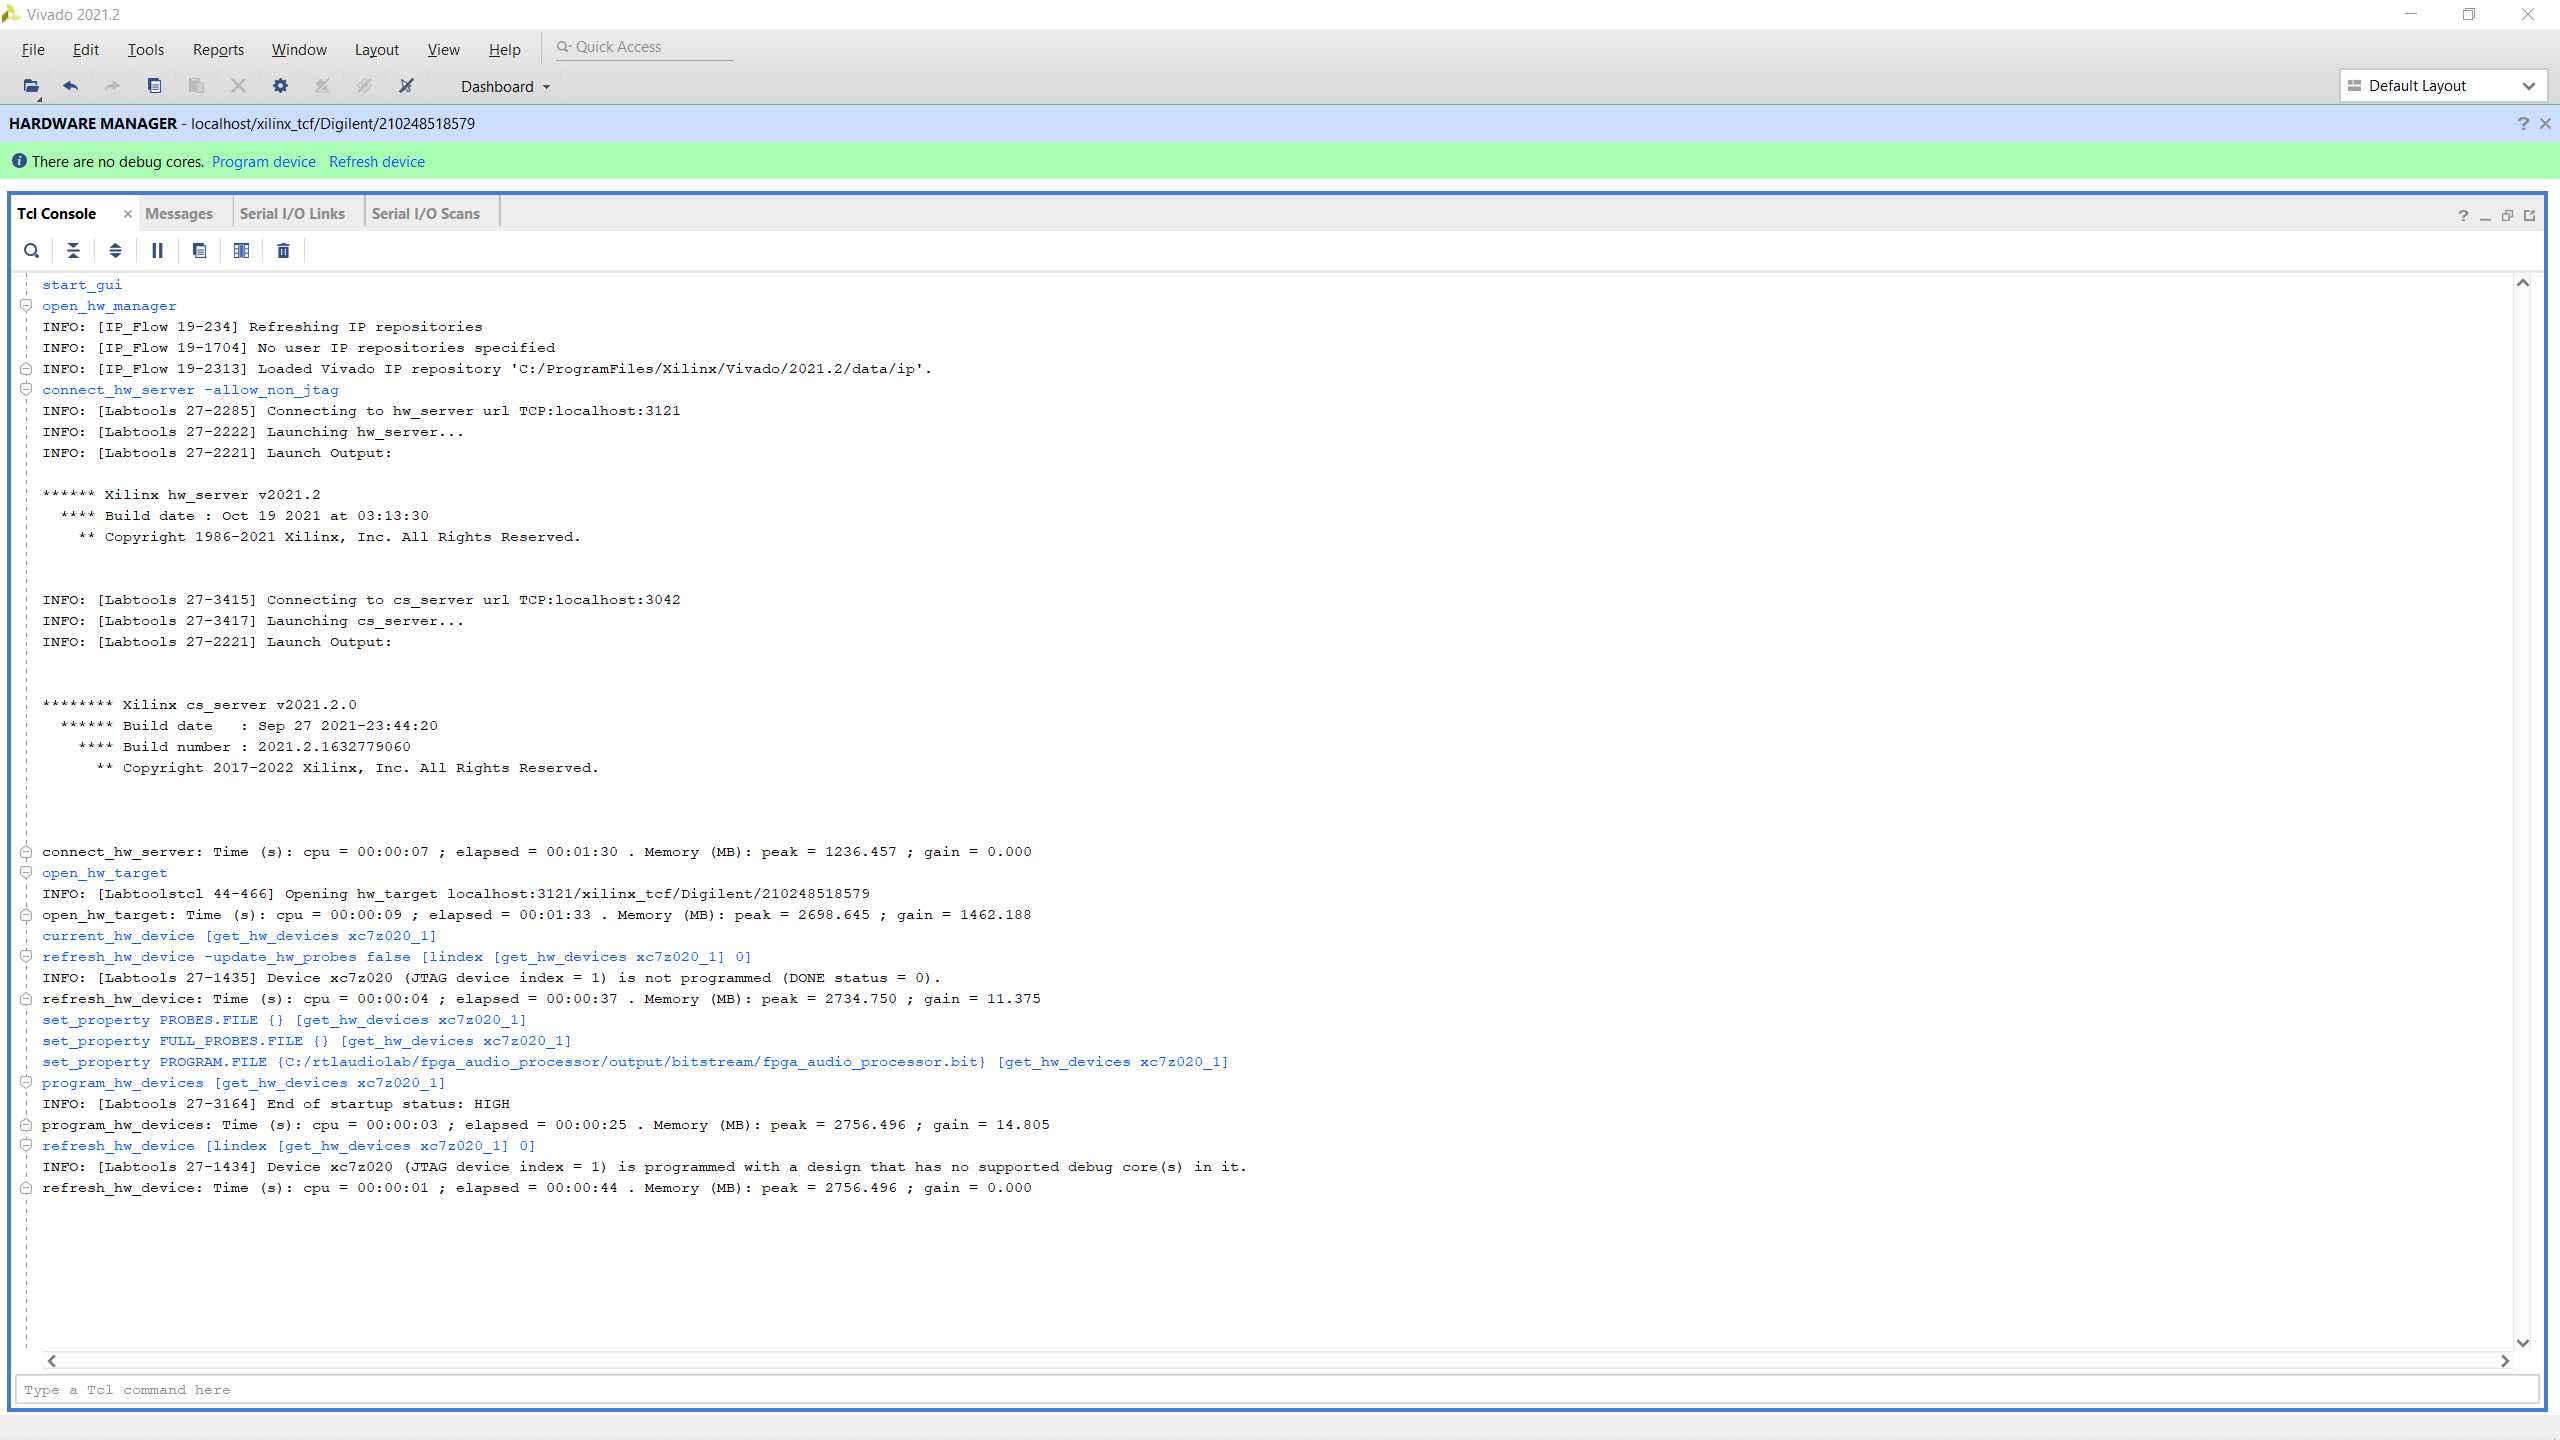
One thing to note here is that these commands correspond to the ‘Open target -> Auto Connect’ option of the Hardware Manager GUI. This assumes that the ‘Open target -> Open New Target‘ process has been performed at least once before.
We can then add those commands to a new step in our Non-Project Mode Build script, as shown in the code below.
# Steps 1 through 9
# ...

# Step 10: program bitstream
open_hw_manager
connect_hw_server -allow_non_jtag
open_hw_target
current_hw_device [get_hw_devices xc7z020_1]
refresh_hw_device -update_hw_probes false [lindex [get_hw_devices xc7z020_1] 0]
set_property PROBES.FILE {} [get_hw_devices xc7z020_1]
set_property FULL_PROBES.FILE {} [get_hw_devices xc7z020_1]
set_property PROGRAM.FILE {../output/bitstream/fpga_audio_processor.bit} [get_hw_devices xc7z020_1]
program_hw_devices [get_hw_devices xc7z020_1]
refresh_hw_device [lindex [get_hw_devices xc7z020_1] 0]
close_hw_target
After running the Build script a few times I added the ‘close_hw_target‘ command at the end. This got rid of an error reported by Vivado when running the scripts several times back-to-back. The error indicated that a hardware target was already open and therefore the device couldn’t be refreshed or programmed. It is also a good idea to change the absolute path of the Vivado Tcl console to a relative path.
So now we have a complete, script-based non-project workflow going from reading the design files all way to bitstream generation and device programming. It’s pretty cool to be able to launch Vivado from the command line, do something else for a few minutes and come back to a configured FPGA. Together with the standalone simulation workflow we discussed a while back, we now have a completely scripted, project-agnostic workflow for the most common tasks in FPGA development with Vivado.
Now I’m curious to explore the scripting of hardware-related tasks even further, like working the Integrated Logic Analyzer. I’m sure we’ll discuss that in a future post.
Cheers,
Isaac
All files for this post are available in the FPGA Audio Processor repository under this tag. If you would like to support RTL Audio Lab, you can make a one-time donation here.