In this post, the second installment of a two-part series, we will explore how to run a standalone simulation in Vivado using Xilinx IP cores.
In the first part of this series we ran a standalone simulation that included only SystemVerilog sources. While this is already useful, many non-trivial designs will include some form of IP components, which are usually managed by the tool without directly exposing the source files. Therefore, we need to know which steps are needed to simulate Xilinx IP cores in standalone mode. A similar approach to the one discussed here is also used to simulate block designs, we will likely explore that in a later post.
Simulating Vivado IP
When working with Vivado IP, we only need to manage the xci file, which contains the configuration for the IP core that we would like to generate. However, we can neither simulate nor synthesize an xci file, instead we must generate the output products associated with it, and then use those output products as sources for our simulation flow.
We will use the simulation of our Equalizer as a use case to see how this works. We won’t make any changes to the design or simulation sources, we will only create a simulation script that will allows us to run the same simulation that we ran in the Vivado project. The simulation script is shown below.
open_project                ../../../project/fpga_audio_processor.xpr
generate_target simulation  [get_files ../../../ip/fixed_to_float/fixed_to_float.xci]
generate_target simulation  [get_files ../../../ip/single_to_double/single_to_double.xci]
generate_target simulation  [get_files ../../../ip/dp_fp_multiplier/dp_fp_multiplier.xci]
generate_target simulation  [get_files ../../../ip/dp_fp_adder/dp_fp_adder.xci]
generate_target simulation  [get_files ../../../ip/double_to_single/double_to_single.xci]
close_project
exec xvlog                  ../../../ip/fixed_to_float/sim/fixed_to_float.v
exec xvlog                  ../../../ip/fixed_to_float/sim/fixed_to_float.v
exec xvlog                  ../../../ip/single_to_double/sim/single_to_double.v
exec xvlog                  ../../../ip/dp_fp_multiplier/sim/dp_fp_multiplier.v
exec xvlog                  ../../../ip/dp_fp_adder/sim/dp_fp_adder.v
exec xvlog                  ../../../ip/double_to_single/sim/double_to_single.v
exec xvlog -sv              ../../../hdl/single_to_double_converter.sv
exec xvlog -sv              ../../../hdl/biquad_equation.sv
exec xvlog -sv              ../../../hdl/biquad_filter.sv
exec xvlog -sv              ../../../hdl/double_to_single_converter.sv
exec xvlog -sv              ../../../hdl/equalizer.sv
exec xvlog -sv              ../../common/wave_file_reader.sv
exec xvlog -sv              ./equalizer_tc_01.sv
exec xelab                  equalizer_tc_01 -s equalizer_tc_01_sim -debug typical -L floating_point_v7_1_11 -L unisims_ver -L unimacro_ver
exec xsim                   equalizer_tc_01_sim -t xsim.tcl
start_gui
open_wave_database          equalizer_tc_01_sim.wdb
Let’s jump right into it. When using IP in a Vivado project, we create and customize an IP configuration file, xci. This is just an xml file, not something we can load into a standalone simulation. Instead, we need to generate the simulation output products for each IP and load those into our simulator. In project mode, this is done by Vivado behind the scenes when we launch a simulation or a synthesis run. Here we need to do it ourselves.
The ‘generate_target’ command in lines 2 through 6 does exactly that: it generates the output products for our IP. This command is also used in the non-project synthesis and implementation workflow, here we use it with the simulation option to avoid generating any files for synthesis or implementation. As argument we need to indicate each of the IP configuration files used in our simulation.
One quirk about the ‘generate_target‘ command: it must be run from an open project. In our case we have a Vivado project for our Audio Processor, so this is not an issue. Alternatively one could generate the output products from a Managed IP Project or from the in-memory project that is automatically created in the non-project mode.
Once the output products have been generated, we can add them to our simulation script. The ‘generate_target’ command creates a ‘sim‘ folder in the directory where the IP configuration file is stored, and within the ‘sim’ folder we can find the Verilog file that we can parse using the ‘xvlog‘ command.
So let’s recap: in lines 1 through 7 we open the Vivado project, generate the simulation output products for the IP, and close the project. In lines 8 to 20 we parse the Verilog sources (both our own and those generated for the Vivado IP).
The other difference with respect to our RTL simulation script can be found in the arguments of the ‘xelab’ command in line 21. When working with Xilinx IP or primitives we should always add the UNISIM and UNIMACRO libraries, as they contain the functional description of the vendor components that we would like to simulate. We also need to add the ‘floating_point_v7_1_11‘ library, which contains the simulation components for the Floating Point Operator IP, the only Vivado IP cores we use in our simulation.
In order to know which libraries we need to add, we can use the ‘export_simulation‘ command, which can be run on an IP configuration file, a block design, or a simulation fileset. As part of the outputs of this command we will get a simulation script, which includes the ‘xelab‘ command with all its associated options and arguments. This is the command I ran for the Fixed to Float IP core:
export_simulation -simulator xsim -of_objects [get_ips fixed_to_float]The generated options for the ‘xelab’ command included libraries that I was pretty sure I didn’t need, like the one related to the block RAM. I decided to get rid of all of them and keep only ‘UNISIM’, ‘UNIMACRO’ and ‘floating_point_v7_111‘, which seemed like the obvious choices. Though this worked, I wish there was a more elegant way to figure out which libraries are actually needed, since the simulation runs even when those added by the ‘export_simulation‘ command are removed.
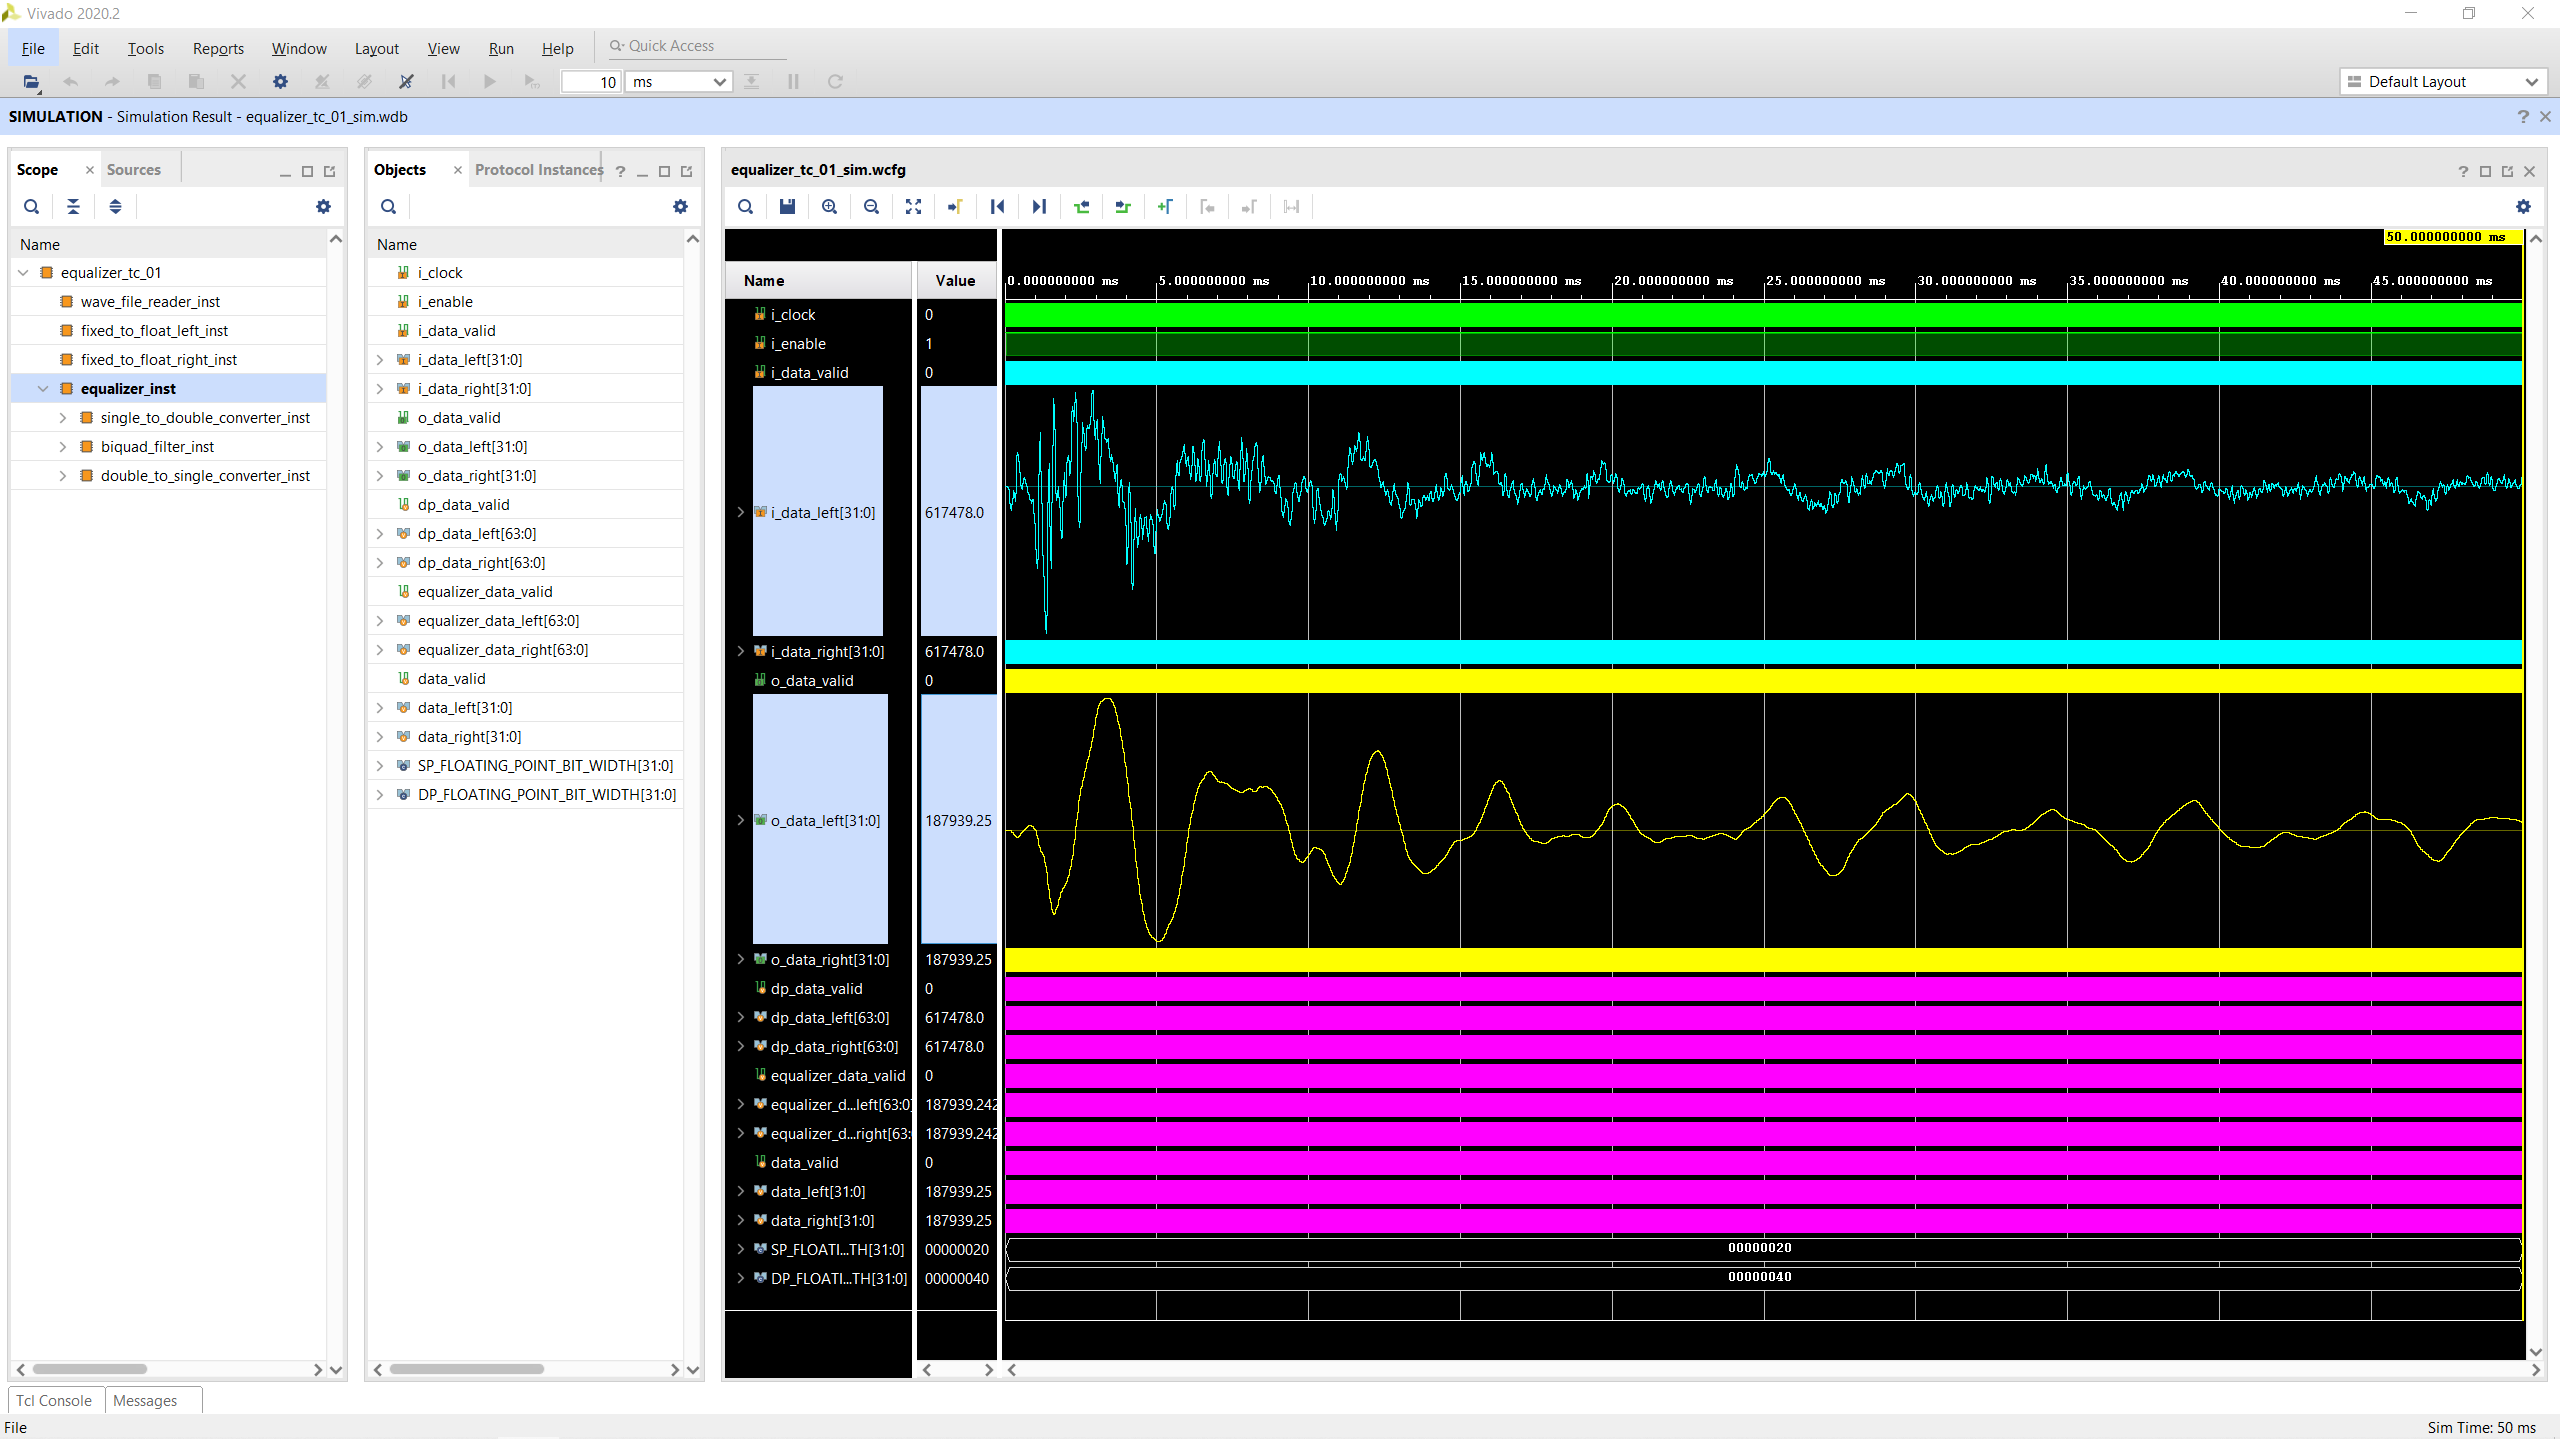
And that’s all there is to it. We can now call Vivado in batch mode and pass it our simulation as we did I\’m the first part of this series. The figure below shows the results of the standalone simulator of the Equalizer. As discussed in a previous post, the coefficients are tuned for a low-pass filter at 500 Hz.
That’s it for this discussion of the standalone simulation workflow in Vivado. I find this to be a more practical and elegant approach to using the Vivado simulator. I’ll use this strategy from now on for the new modules of the Audio Processor project, and if I find the time, I will start migrating the existing testbenches to this workflow.
Next week we will return to exploring an audio-processing module by implementing a limiter core. Stay tuned!
Cheers,
Isaac
All files for this post are available in the FPGA Audio Processor repository under this tag.